Tuesday, November 27, 2012

"All About Me..." Blog Hop


Good Morning Everyone!
 
Today I am participating in a unique Blog Hop put together by Shelley.
Our Blog Hop today is All About Me.  And let me tell you it was not easy trying to scrapbook
me!  I am so used to scrapbooking or making cards for others that to try and focus on myself
was difficult.  I am sure throughout this blog hop you will see many of us crafting sisters feeling
the same way.  :)  Don't you?
 
Are you ready to see my project?  Great!  But first make sure you stopped at Nadja's blog to first.  We would not want you to miss a stop in this hop.  :) 
 
I decided to put together a mini album made of chip board.  I thought once this hop was over
I would keep it by my crafting table to remind me of my favorite things and things that inspire me.

This is one of the most important days of my life.  The day of my Baptism.
  I gave my life back over to Jesus Christ.
October 27, 2001
Wedding Day. 
My precious children
My best friend at her wedding.  She has been through so much with me. 
We have been friends since our Junior year in high school.   I can't even count
how many years ago that was... hahaha!
This was one of my favorite times in my life.  Our mission trip to Haiti.  God called my husband and I
to plan out trip to Haiti with our church.  Some people thought we were crazy, especially leaving our 'not even one year old' little girl at home.  But we were so confident in God and His word that I was comfortable doing this.   So, ever since then, Haiti has always had a soft spot in my heart.
I love animals, especially dolphins, puppy's and horses.  One of my goals in life is
to eventually swim with a dophin.
Here is are some more things about me and what I love.

I hope you enjoyed learning a little more about me.  Feel free to share your story. 
I always love to hear from you. 

Now it time to hop on over to my friend  Robin and learn a little more about her. 

Enjoy and don't forget to comment and become a follower on all of our blogs to win this incredible
blog candy offered by Shelley.


Here is the Hop list in case you get lost.
 
Have a blessed day everyone!


1. Shelley Peeler - http://shelley-scrapbookingforfun.blogspot.com/

2. Judy Hardwick- www.bepresentbereal.blogspot.com/
...

Saturday, November 17, 2012

Cricut® Cards and Envelopes

Big News this week.....   I decided to join Close to my Heart.    I wanted to share this great video with all you Cricuteers.  If you are thinking of getting a Cricut for Christmas or on the fence, so to speak.  Feel free to ask any questions.    Enjoy the video and have a blessed night!


Wednesday, November 14, 2012

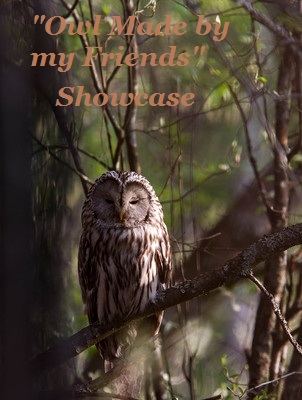
"Owl made By My Friends Showcase"

 
Hello! Welcome to the "Owl Made by my Friends" Showcase today. 
A dear crafting sister of mine loves owls.  And I do mean LOVES owls.  So, I thought it would be fun to join in on her showcase of some owl creations.
 
If you have not started at Heather's blog, remember to hop on over there to start.  Heather's awesome blog is www.http://heathernovinger.blogspot.com/2012/11/owl-made-by-my-friends-showcase-giveaway.html
 
 
ONE you awesome followers that visits each of our crafty friends' blogs to see how they made their owl creations will win some fun prizes!! (Picked by Random.org) All of us, would love it if you'd follow our blogs, too! Please remember to leave Heather a comment telling her that you visited her crafty friends blogs to be added in the drawing!

And finally, on to my Owl card creation using my Cricut Imagine and Paisley cartridge.
,
Base of Card


Owl from Cricut Cartridge Paisely .


Recipe for card my "Woot Woot" card:

Base-7 1/2 x 10 1/2 (folded and scored in half)
-printed paper from page 38 of the Cricut Imagine cartridge Enjoy the Seasons

Owl- cut out at 3 3/4" from the Cricut cartridge Paisley page 42 (I pop dotted each layer)
-Flower - cut at 1" (pop dotted)
-goggly eyes
-bling
-faux stiching
-inked the edges

Branch- cut out at 3 3/4" from Cricut cartridge Create a Critter page 25
- embossed with Distressing stripes Cuttlebug folder
-Leaves were crinkled and ink distressed with Tim Holtz Wild Honey ink

"Woot Woot" - cut out at 1" from the Paisley Cricut cartridge page 43
- ink distressed with Tim Holtz Vintage Photo

Thank you for stopping by now rememeber to go back to Heather's blog to check in on all the other creations today and for the fun prizes.

 Hugs!! 

Monday, October 22, 2012

My Cricut Craftroom-Would You Ever Guess Wednesday

 
Happy Wednesday ya'll!! 
 
Welcome to my project for My Cricut Craft Room's Design Team.  My challenge for using gel pens or markers came at the right time.  I just started a new Bible Study and our handouts come with three holes punched in our papers.   So, being the 'wanna be' organized person that I am, I decided a three ring binder was the way to go....  Make that a 'Cricut' decorated three ring binder.
 
Here is a  photo of my completed binder.  I love the way it turned out!   

 
I started out cutting down my Creative Memories Christian paper to fit the binder, front and back.   I used the New Testament cartridge for my scripture.  I used my Cri-Kits black gel pen instead of my cutting blade to write out the above scripture verse at 6",  you will find the verse on page 62 of the  New Testament handbook.  The letters are colored in with my Prisma watercolored pencils and I inked the white cardstock with Tim Holtz's grape, adn old paper distressed inks.

 
You will find this cross on the New Testament cartridge, also.  It is on page 59.   Again, I used the black gel pen to print out a border for the cross and  then cut it out at 5".    I used white cardstock so I could color in the cross outline with my Prisma Pencil, then outlined the areas I left white with my crystal colored Stickles.
 
Lacy Labels was used to cut out my label for "BSF", Bible Study Fellowship.  I liked the shape of the label and the swirl for the one labeled "family".    I cut these out at 2".  I cut out the word 'family' and kept the swirl.  Then I cut out the letters "BSF" with my Expression 2, using the pre-installed  Cricut Alphabet cartridge.    To match my yellow colors,  I also, colored  my letters  using the Prisma pencils and then  inked the sides.  I also embossed the label with my Cuttlebug, added some stickles and a sheer ribbon.
 
Lastly, I used my Cricut Imagine with the printable vinyl.  Using the Storybook and Imagine Hopscotch cartridges,  I printed out the word "Genesis" and a filled in shadow frame.  Sorry, I forget what page.  Which I adhered to the side of my binder.

 
Thanks again for stopping by.  I'd love to hear from you, so leave me a comment or two and don't forget to see the other project ideas the design team came up with today.


Friday, October 12, 2012

I've been nominated for the Liebster Award!!


Thank you Melanie at www.afternoonscrapper.blogspot.com, for nominating me for this awesome award!! I love it !!! Thank you!

 
ABOUT THE AWARD


Liebster is a German word meaning "Beloved," "Favorite," or "Dearest." This award is a peer to peer award in which fellow bloggers present the award to their favorite bloggers with less than 200 followers. The origins of this award is unclear, but is believed to have originated by a German blogger. This award was designed to be a blog award in the pay it forward fashion to share your dearest and most beloved blogs that have less than 200 followers.


Now, I have the opportunity to nominate 5 other blogs.  I'm off to find my nominations!

Thank you again Melanie!!
 

Sunday, October 7, 2012

100 Cricut Cartridge Blog Hop-October

 
Welcome to Erica's Craft Room 100 Cricut Cartridge Blog Hop Day  TWO.  You should have started at My Cricut Craft Room if not, please head back to start at the beginning.  Collectively the design team uses over 100 different Cricut Cartridges in their projects during the two days of this hop. You should have come from Jodi's blog at  http://jodiesscraplab.blogspot.com/
 
There are three special projects I have for you today.  So, let's get started.
 
Project #1 - Inspired Hear tCartridge.  I made two cards using this cartride.  One is a sympathy card  and the other is a Thank you card.    The Cross's are cut out at 4" (blue) and 3" (purple).  I inked them both using Tim Holtz's Tumbled Glass and Concord Grape.  I  embossed  each with my Cuttlebug using the  embossing folders, Poka Dots and Textile.  The Cross's are also pop dotted.


Project #2 -Imagine Blast Off Cartridge was used to make this HUGE map of the United States.  My husband travels and we use this to help the children see where he is and how far away he is from home.  When I used my Imagine Blast Off cartrige for this project, I actually used the cartridge in my E2.  I cut the letters using Blast Off, I think they are approx 2".  Everyday Paper Dolls was used for the road, the truck (like daddy's work truck) came from New Arrival, and the ladder that I laid on top the truck, like my husband has, was cut from the Handy Many Lite Cartridge.  Lastly, the sign that says "home" is from Pooh and Friends.

 
Project #3 - New Arrival , Boys will Be Boys, Create a Critter, Princess Dreams Come True were all used in my next project.  I made a baby card for my Sister in Law that just had her second son.  I wanted to make it 'different' from all the normal baby cards.  I think I succeeded. 
The monster truck is cut at 2" from the Boys will Be Boys cartridge,  I embossed the top half of the truck with my Cuttlebug, then inked it with silver and heat embossed for a metal shinning coating. Glossy Accents were used to give a shine to the window and the head lights.
The 'dirt' are just strips of ripped paper that I inked using the Tim Holtz Vintage Photo stamp color.
"It's a Boy" is cut at 1" and is from New Arrival. The cloud's and grass are cut at 1.5" from Create a Critter and inked. The stones are approximately .50" to .75" and are from the Princess Dreams Come True. The baby is cut at 2.5" from the New Arrival cartrige also. I did cut him from the blackout feature and flip him on my E2. Since, I used the blackout feature on this cartridge I was able to use one of my new Peachy Keen Stamp called Fun Kiddie Face stamps
 
 
Thank you for joining our Blog Hop today.  I hope you enjoyed it and will continue on to Christina's blog for the next project.  Here is the complete Blog Hop list in case you missed someone.  And don't forget to check out the Blog Candy.  It is amazing!!!


Tuesday, October 2, 2012

Scrapbook Friday

Happy National Teacher's Day!
 
  For my themed project today, I decided on using my son's first day of school pictures.  This year he started Developmental Kindergarten or Young 5's, deepending on how you know it.  This is also the first year he is able to take the bus with his older sister.  I still need to add a another LO or two for all the pictures but this is the first page. I think I went a little picture happy on the first day of school.  Yikes!

 
I started out using a 12x12 paper by DCWV- The Glitter Stack.  The photos are matted on Creative Memories paper with Chocolate stickles added for embellishments.  My school bus was made from the Cricut Cartridge Locker Talk and cut at 5".   The children and bus driver are cut from Everyday Paper Dolls at 2".  I did cut their whole bodies, then cut off from the neck down.  I also only had white paper so I used one of my Prismacolor markers to give the faces some color. I  used my Gypsy to hide their premade faces. Then I stamp new faces using my Peachy Keen Everyday Character and Simple Simons face stamps.
 
 
The Bus Stop sign is cut at 4", also from the Locker Talk cartridge on page 34.  I embossed the sign with  my Cuttlebug and the Forest Branched embossing folder.  I then used the Tim Holtz destressing ink to help enhance the sign.  "Bus Stop" letters are Creative Memories stickers I had on had and then then to help them match more I used Apple Green Smootch Paints to color them.
 
Lastly, my 'first day of school' sign is cut at 3" and is also from Locker Talk.
I added stickles to the inside cuts of the letters. My apple has chocolate stickes for the steam and again, I used the Lime Green Smootch paint for the little leaf that is attached.
 
 
Thanks for stopping by today.  Please join me  in heading over to the see all  my other design team sisters with similar projects at www.mycricutcraftroom.blogspot.com
 
Blessings!
 
Tess